Git and GitHub Branches, Why are they important?
In this post will be covering the basics of branches, what are they and why are they super useful and important to manage your codebase and work flow!
What is a Branch?
A branch creates a virtual clone of the main branch directory which you can make codebase changes to without effecting the initial codebase. This could be for example, a new blog post being created, or a bug fix or feature being added to the codebase.
Creating a Git Branch
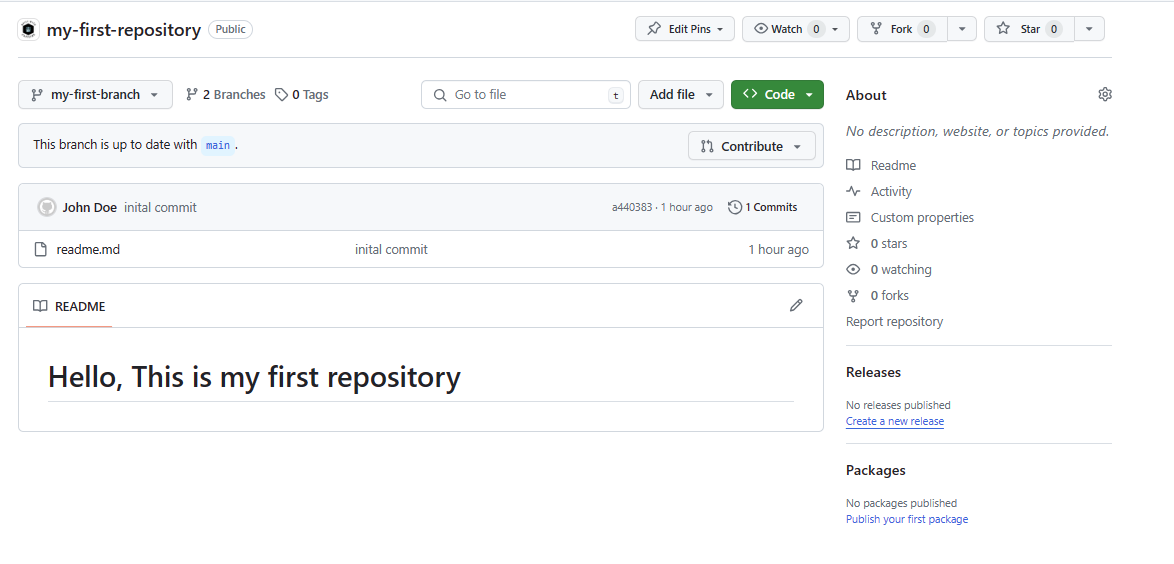
In the initial post, we created a GitHub repository my-first-repository we are going to using the same repository for this post.
From your favorite terminal and enter into the working directory of your repository.
In my case it is c:\code\my-first-repository:
| |
Now we can create a new branch using the following command:
| |
We can also check to see what local branches we have by using the following command:
| |

Creating a GitHub Branch
From the GitHub Repository page, click on the main button and enter the name of the new branch you want to create.
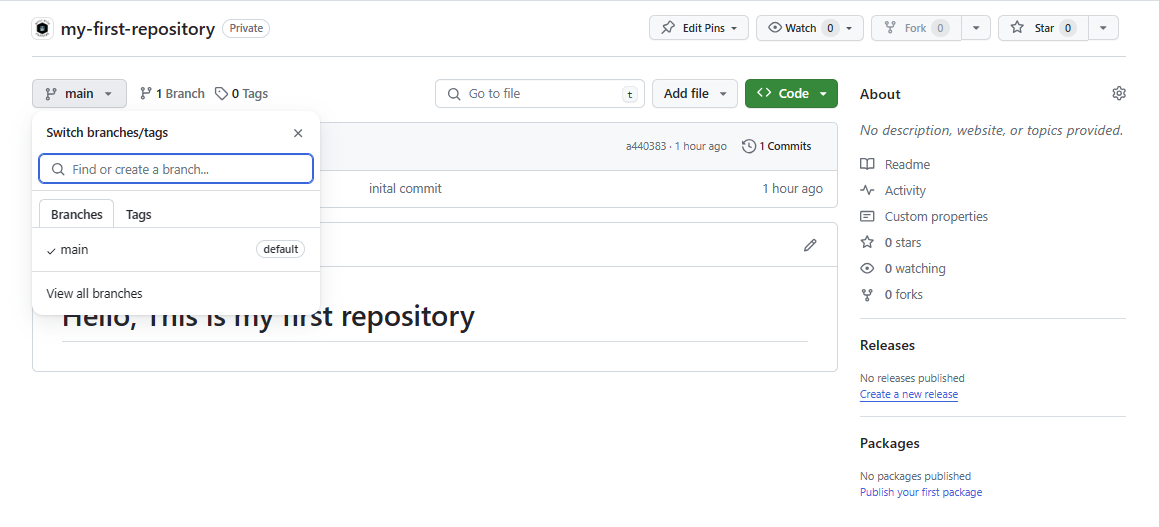
From the dropdown you can enter the name of the new branch you want to create.
| |
GitHub Branch Protection Rules
Now we have covered the steps of creating a branch. It is now time to secure the main branch. The main branch is the default branch for all GitHub repositories and should be seen where the production codebase lives.
If you want to find out more about Branch protection rules you can chheck out the GitHub docs here.
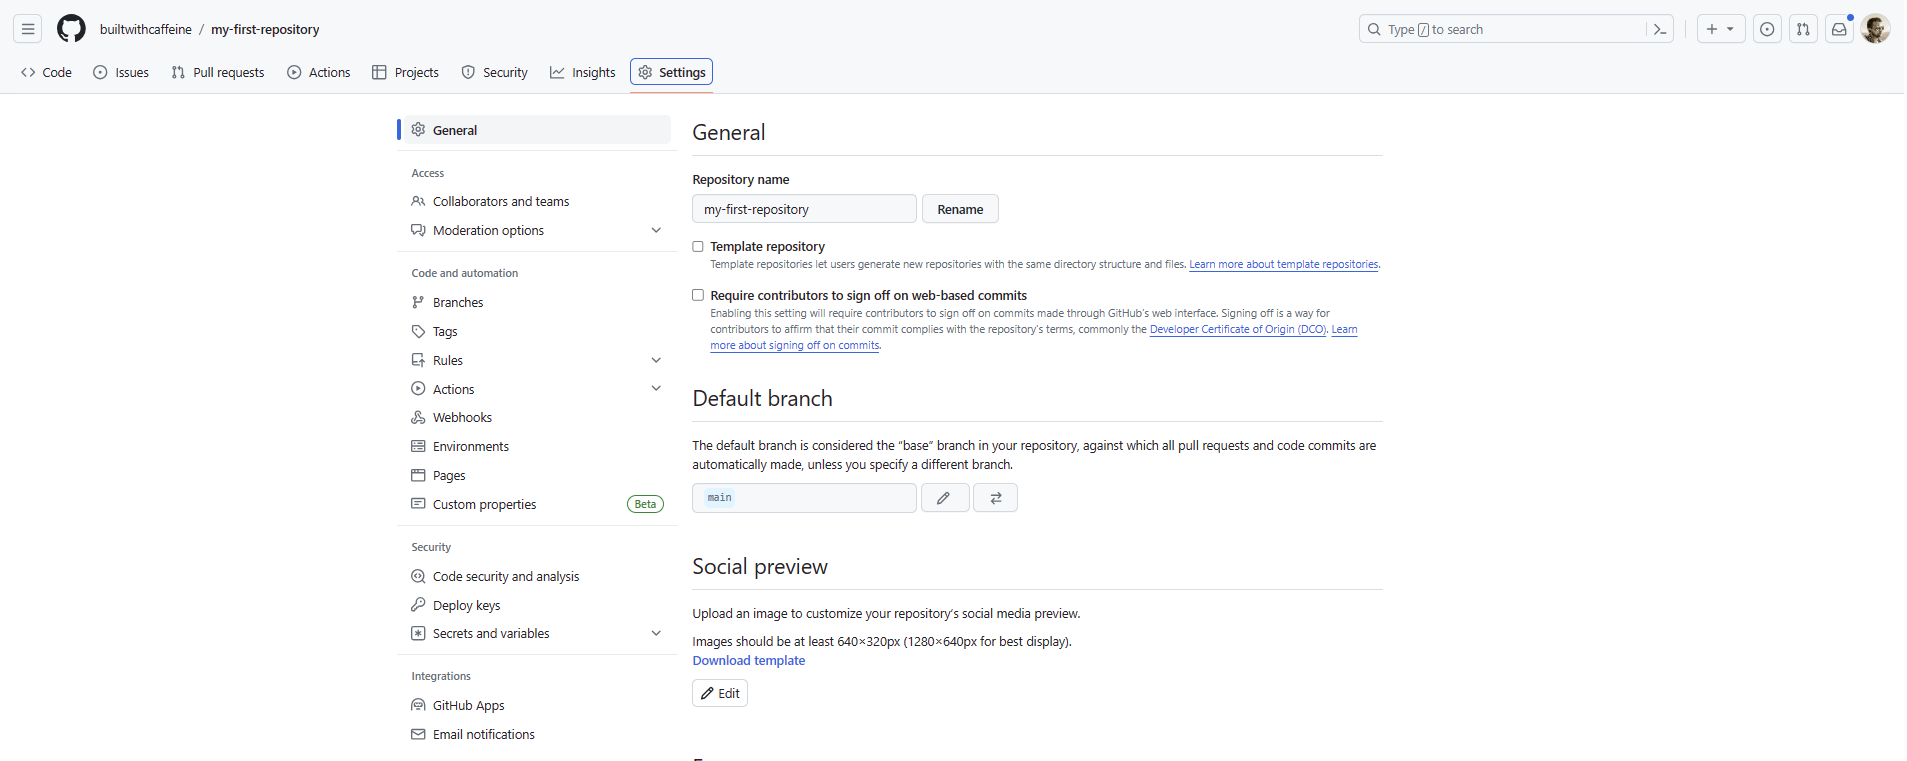
Right, Lets get started! Fire up your favorite web browser and navigate to your GitHub repository.
In my case it is https://github.com/builtwithcaffeine/my-first-repository
From the repository page, click on the Settings tab and then click on the Branches tab from the left hand menu.
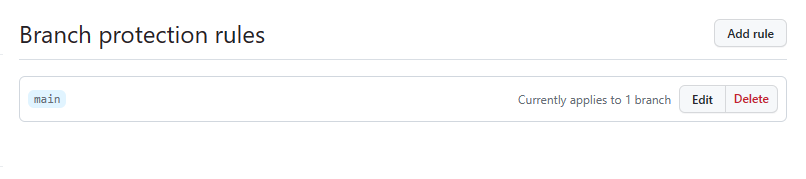
Initially this is what you will see:
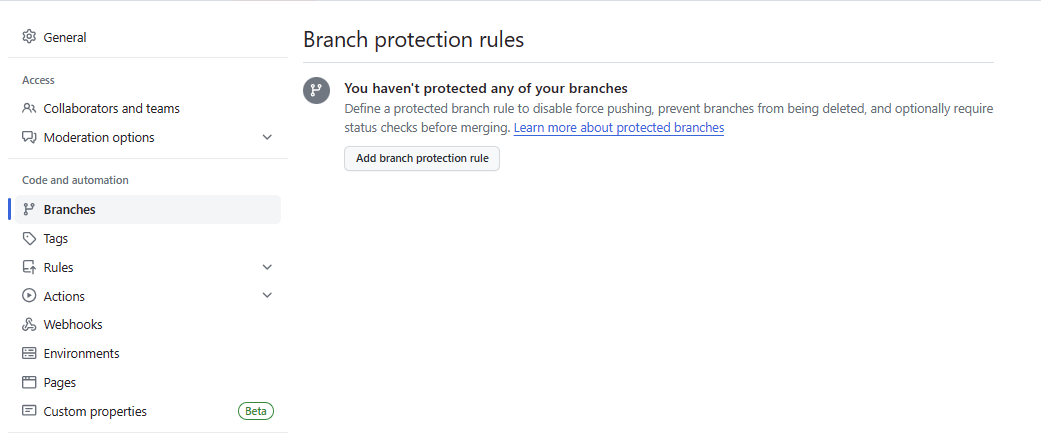
From here we can add a new branch protection rule by clicking on the Add branch protection rule button.

Granted there are many options here, but for this example we are going to keep it simple and enforce the following on the main branch
- Require pull request reviews before merging
- Do not allow bypassing the above settings
When enable the option for Require a pull request before merging, there is then an option to specify how many reviewers are required before a pull request can be merged. For this example we are going to set this to 1.

This is ideal when working in a team environment, as it reinforces the use code reviews to take place before the code is merged into the main branch.
However, this is not ideal for a single developer working on their own. So we can untick the option to Require approvals. Doing this just means that you don’t need a second person to approve the pull request. It just stops you commits directly to the main branch!
So to summarise this is how the branch protection rule should look:

Congratulations! You have now secured your main branch and enforced the use of pull requests to merge code into the main branch.
Testing the Branch Protection Rule
When doing this in production, please ensure that you have someone check the PR, and not just merge to main.
Ok, So we have created a branch protection rule, but how do we test it? Well, we can do this by creating a new branch and then trying to push our changes directly to the main branch.
For this example we can try and edit readme.md file directly on the main branch.

and when come to commit the change now we see the followng:
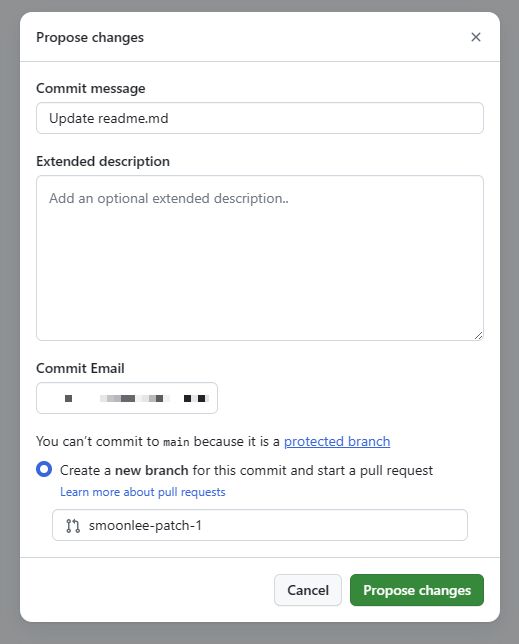
Notice that we cannot commit direct to main and are forced to open a pull request.
Creating a Pull Request from a Branch
Lets create a new branch and then try to push our changes directly to the main branch.
| |
Now we need a file or something to commit, so lets create a new file called my-new-file-to-commit and add some text to it.
| |
and now we commit the file to the branch.
| |
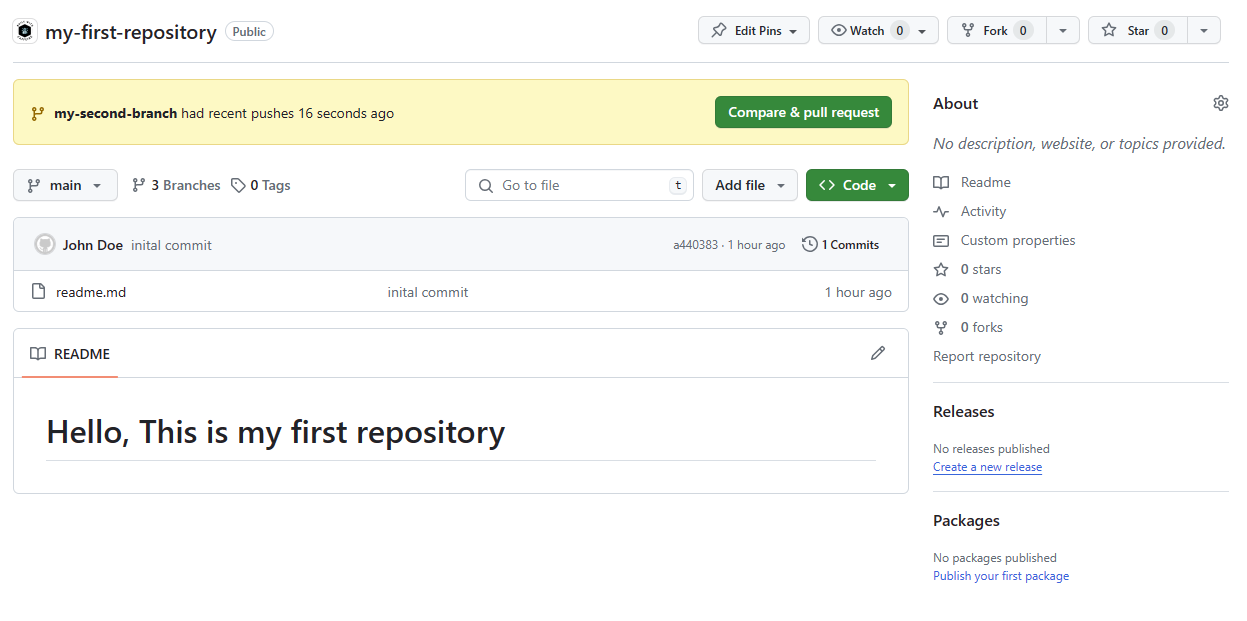
From Github you will see a yellow box showing the latest commit and a button to Compare & pull request
This will take you to the pull request page, where you can review the changes and then merge the pull request into the main branch.

When working in an organisation or Team setting, this is where you will want to assign Reviewers to the pull request. This will ensure that the code is reviewed before it is merged into the main branch.
It is also good practice to add a details description of the changes that have been made to the codebase. This will help other developers understand the changes that have been made and potentially save time on code review.
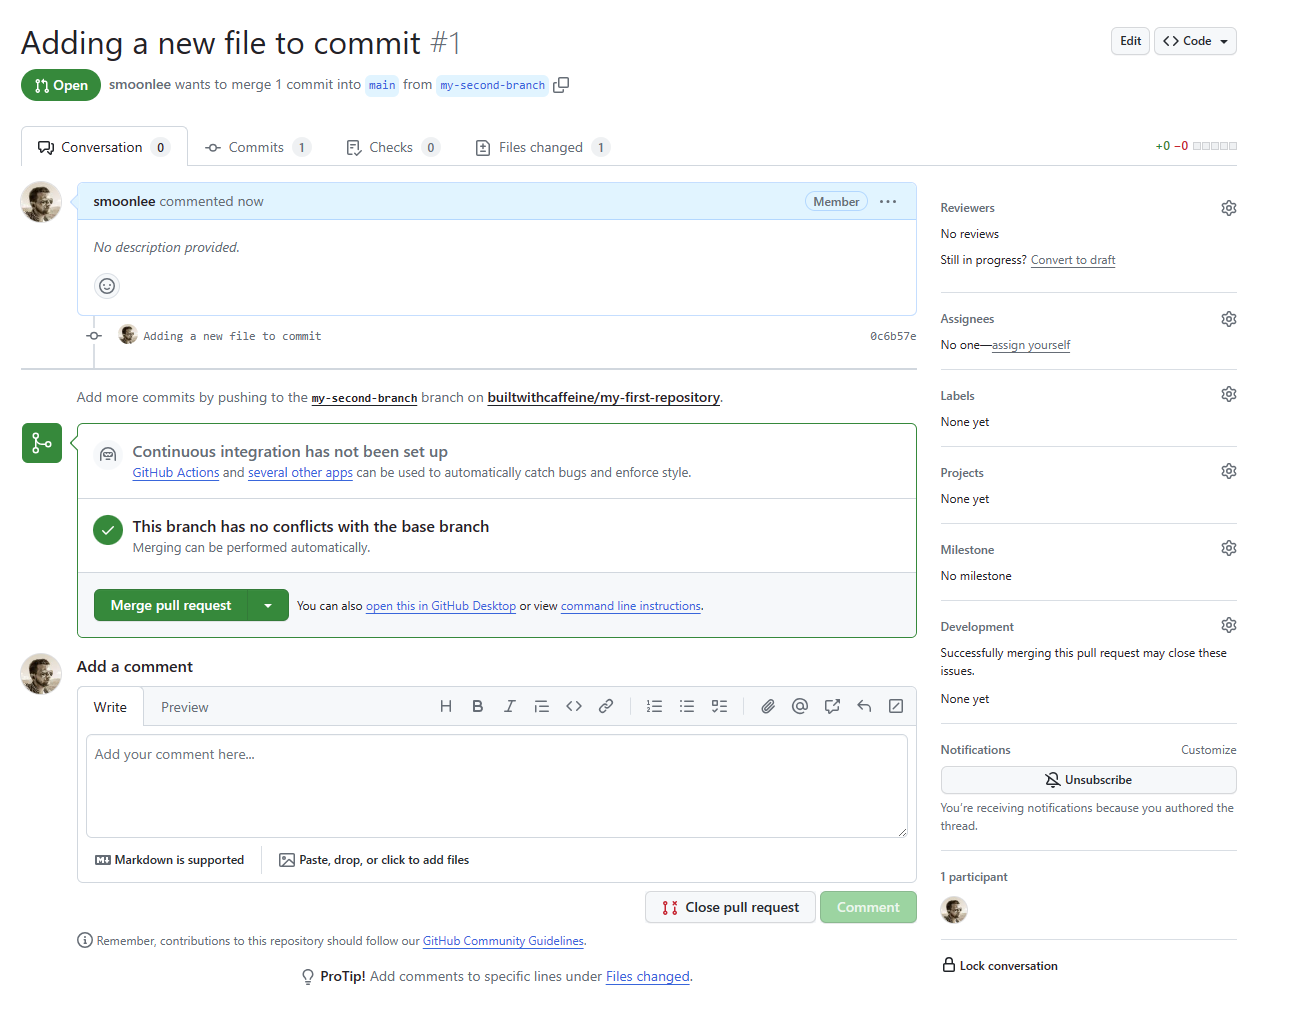
Ok so the pull request has been created and is pending review. at this stage there are a couple of things which can happen when you open a pull request, depending on what is required, you could have a GitHub Action trigger to run some testing on the code committed.
In this example though we have committed a single file, We can see the changed made in the Pull request under the Files changed tab.

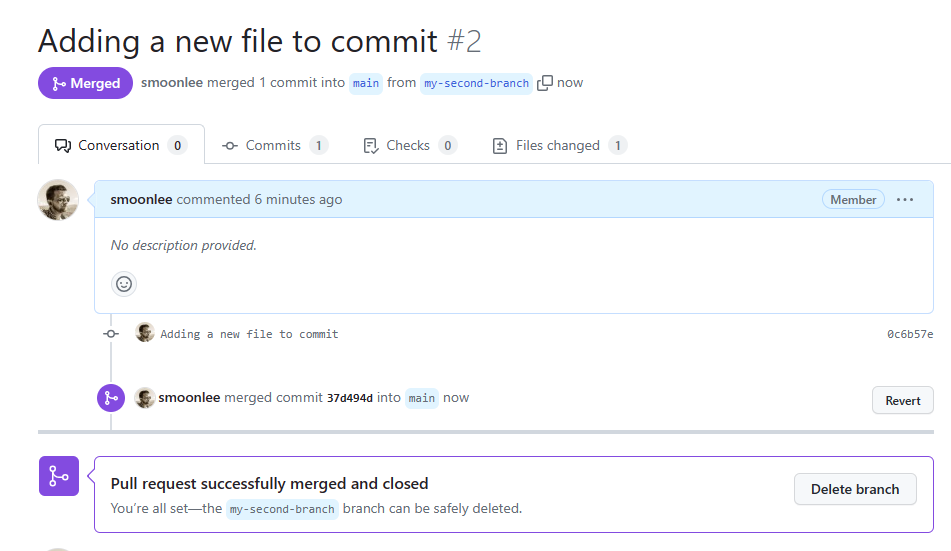
Once we are happy with the code changes, from the conversation tab we can click on the Merge pull request button with the famous sign off of LGTM (Looks Good To Me) and then click on the Confirm merge button.

and that completed the merge from my-second-branch into main branch.
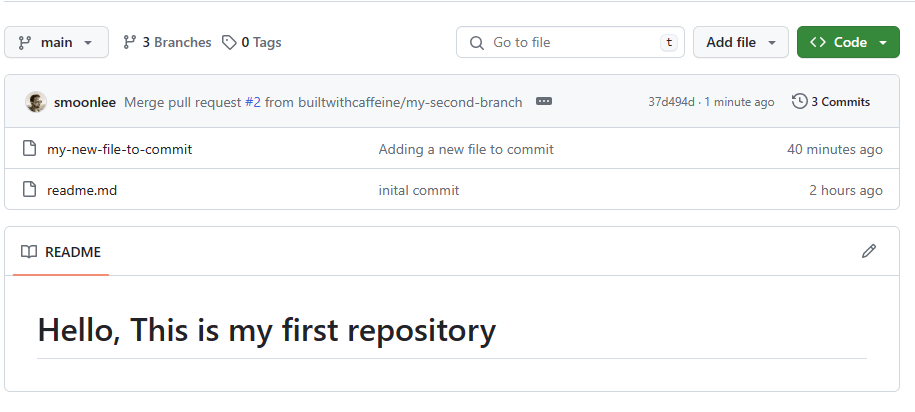
Finally if we check the main branch we can now see two files
Branch House Keeping
Branch Clean Up
Now that we have merged our pull request, we can now delete the branch. This is good practice to keep your repository clean and tidy!
When you first create a repository, this is a manual process, Once the merge has been completed there is a button to Delete branch at the bottom of the pull request page.

However, if you are working in a team environment, you can configure GitHub to automatically delete the branch once the pull request has been merged. This is done by clicking on the Settings tab and then from the General page scroll down to the just under half way and you’ll find this option.

If this is enabled, then once the pull request has been merged, the branch will be deleted automatically. - It can help with keeping your repository clean and tidy and not leaving branches hanging around with old code in.
Pull Request - Auto Merge on Success
If your working in a team environment, you may have multiple developers working on the same codebase. This can cause issues when trying to merge code into the main branch. So taking advantage of unit testing and automated code reviews, you might find this option useful to automatically merge pull requests into the main branch pending a successful code review and unit tests.
For more information you can check the Github Docs.
