What is Git and GitHub?
Hello again people of the Internet! This I think might turn into a small mini series of posts to help others learn about the usefulness of Git and GitHub. I will be covering the basics of Git and GitHub, How to use them and in the later stages cover how to deploy your code to Azure. That said, for this post - we will cover:
- Installing Git.
- Creating a GitHub Repository.
- Cloning a GitHub Repository to your local machine.
- Initial push of a readme.md file
What is Git?
Git is a free and open-source distributed version control system designed to handle everything from small to very large projects with speed and efficiency. Git is easy to learn and has a tiny footprint with lightning-fast performance. It outclasses SCM tools like Subversion, CVS, Perforce, and ClearCase with features like cheap local branching, convenient staging areas, and multiple workflows.
For more information on Git: Git Docs
What is GitHub?
GitHub is a code hosting platform for version control and collaboration. It lets you and others work together on projects from anywhere.
For more information on GitHub: GitHub Docs
What is a Repository?
A repository is a storage space where your project lives. It can be a local folder on your computer or a storage space on GitHub or another online host. You can keep code files, text files, image files, you name it, inside a repository.
What is a Branch?
A branch is a parallel version of a repository. It is contained within the repository, but does not affect the primary or master branch allowing you to work freely without disrupting the “live” version. When you’ve made the changes you want to make, you can merge your branch back into the master branch to publish your changes.
Why do we need Git and GitHub?
Git and GitHub are essential tools for any developer, whether you are working on your own or as part of a team. It allows you to track changes to your code, revert back to previous versions, and work collaboratively with others.
Using Git and GitHub, you can easily deploy your code to Azure and ensures that good coding practices are followed. It also allows you to track changes to your code, revert back to previous versions, and work collaboratively with others.
For example at work, We enforce the use of branch protection on the main branch. This means that no one can push directly to the main branch. Instead, we have to create a new branch, make our changes, and then create a pull request to merge our changes into the main branch. This ensures that we have a record of all changes made to the codebase and that we can easily revert back to a previous version if needed.
Getting started with Git
First, You want to ensure that you have Git Installed on your local machine.
For Windows
| |
For Linux
| |
Configure Git Global Settings
Once git is installed there are some initial configuration steps we need to completed, the first is to set your username and email address. This is important as every Git commit uses this information, and it’s immutably baked into the commits you start creating:
| |
next is to configure your email address:
| |
If you want to see the contents of the git config file you can use the following command:
| |
Why is are these two Git configuration options important?
Well, When you make a commit, Git stores your name and email address in the commit. This information is used to identify the author of the commit.
Once configured, below are two examples for John Doe
 and then from the commit history, you can see the following:

Important:
So this is important to use, So your organisation knows who made the changes to the codebase!
Getting Started with GitHub
Note:
This step assumes that you already have a Github Account and are logged in.
Creating a Repository
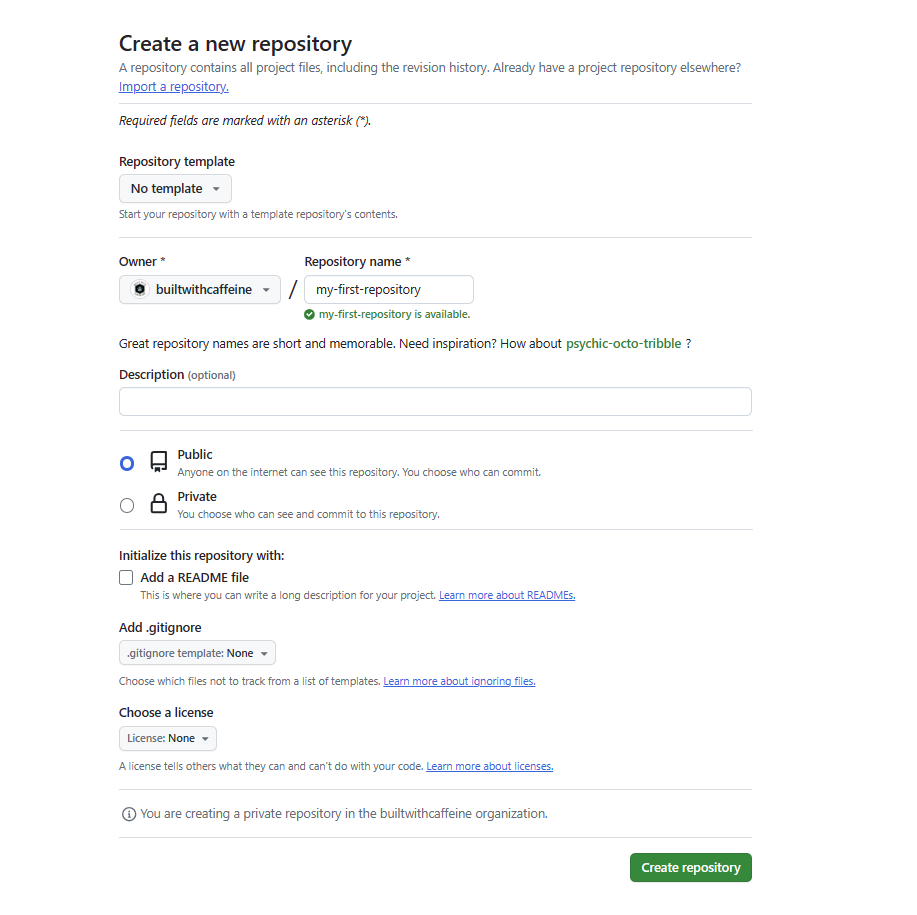
From the GitHub homepage, click on the + button from the dropdown choose New repository.

You will then be presented with the following screen: From here you can choose the name of your repository, whether it is public or private, and whether you want to initialize the repository with a README file.
Note:
for this example, We are leaving the repository as public and not initializing with a README file.
Once you have completed the above steps, click on the Create repository button and you will be taken to the following screen:
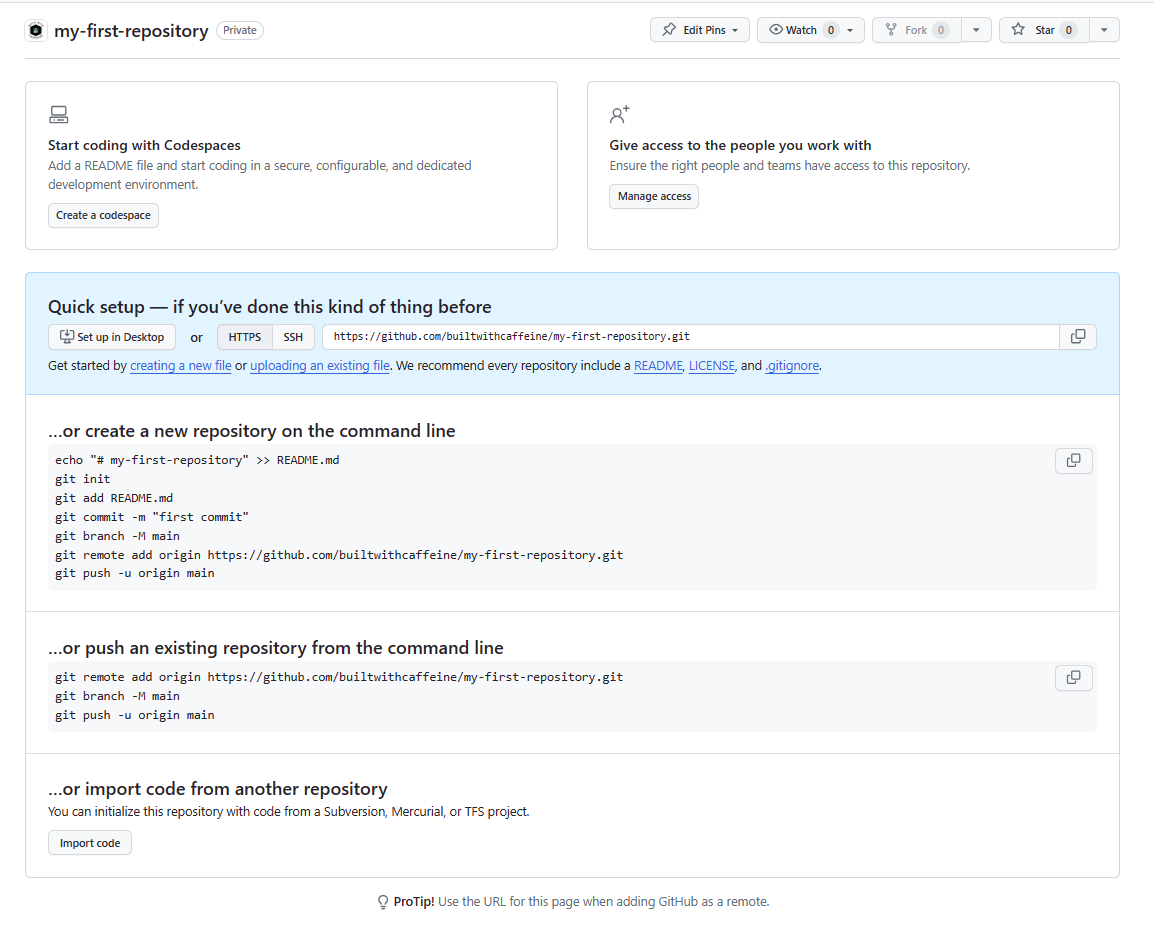
Cloning a Repository
Now that we have created a repository, we need to clone it to our local machine. This will allow us to make changes to the code and then push those changes back to the repository.
To do this we need to copy the URL of the repository, We can use the Quick Setup option to copy the URL to our clipboard.

| |
Next open your favorite shell or code editor and past the command and you should see the following:

Creating a README file
Now that we have cloned our repository to our local machine, we need to create a README file. This is a file that will contain information about our project. It is also the first file that will be displayed when someone visits our repository on GitHub.
To create a README file, we need to create a new file in our local repository. We can do this by using the following command:
For Windows
| |
For Linux
| |
Once we have created the file, We can open it in our favorite text editor and add some content. For this example, we will use Visual Studio Code.
| |
Note:
For those who are new to Markdown, I would highley recommend having a read of:
Getting Started with Markdown
Note:
There is also a really helpful VSCode Exntesion for Markdown called:
Markdown All in One
Tip:
If you want to view your Markdown in real time you can use:CTRL + \to create a split colum viewCTRL + SHIFT + Vto enable Markdown Preview

Commiting to GitHub
Once we have finished customizing our README file, we need to save it and then commit it to our repository. To do this we need to use the following commands:
Git add
What does git add?git add adds changes in the working directory to the staging area. It tells Git that you want to include updates to a particular file in the next commit.
There are two main ways to use git add:
git add .will add all files in the current directory and all subdirectories.git add <file>will add a specific file.
| |
Git Commit
What is git commit?git commit creates a commit, which is like a snapshot of your repository. These commits are snapshots of your entire repository at specific times. You should make new commits often, based around logical units of change.
| |
Git Push
What is git push?git push updates the remote repository with any commits made locally to a branch.
| |
You can also combine the above commands into one command:
| |
Post Summary
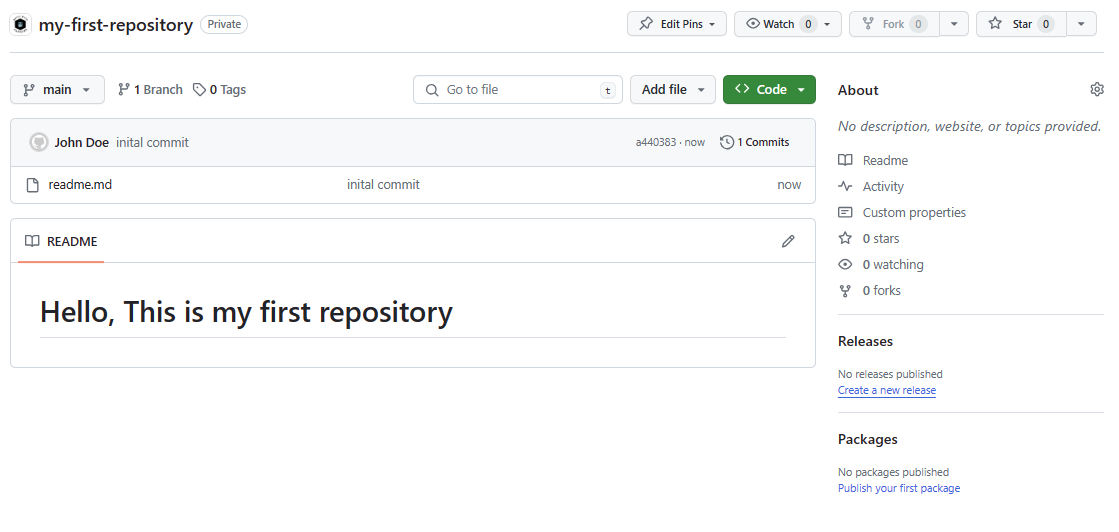
To summarize then for this post, We have coved the very initial basics of getting you started in Git, Creating your first public repository and then cloning the repository to your local machine, creating a readme.md file. push the readme file to the repository. If you want to check out the example repository, you can find it here: My First Repository
I hope this helps those who are new to using Git, There will be more to follow the coming weeks on GitHub.
Until then, Happy Coding! 🚀