Back in July 2024, I blogged about an issue I’d run into with static generated sites and the lacking ability to be able to schedule posts on demand for mini series or when on holiday.
When, lets call it “Version 1.0” of the HugoScheduler was released, There were some known issues with the AVM (Azure Verified Modules) for creating a Function App. The main issue was with the storage account and account keys and using the previously tested method from the CAMRL (Common Azure Resource Modules Library) modules was no longer supported, as Microsoft saw the exporting of keys as a security risk. Which I guess it was. However at that time it meant that you could’nt deploy an Azure Function app solely using the AVM Modules… Sad times.
For previous context, this is what the custom Storage Module looked like:
| |
However since then, the AVM modules have been updated and improved and with the release of version 8.0.0 of the Storage Account module. There is now a supported feature for deploying a Storage Account and passing the secrets direct to a Key Vault, Pretty cool right?! An snippet’d example is shown below.
| |
Which got me thinking, As it now looks like we can use PURE AVM to create a function app, Lets see how this goes… Hence this blog post being delayed by about two months, But I think it’ll be worth it.
What are Azure Verified Modules?
Azure Verified Modules are pre-built, reusable components in Azure that are designed to simplify the development and deployment of Azure services, particularly in the context of Azure IoT (Internet of Things). These modules are verified by Microsoft to ensure they meet specific quality, performance, and security standards.
Key Features of Azure Verified Modules:
Security and Reliability: The modules are tested for vulnerabilities and performance, ensuring that they can be safely deployed in production environments.
Compatibility: They are designed to work seamlessly with Azure services, providing interoperability and easier integration.
Documentation and Support: Verified modules typically come with comprehensive documentation and support, making it easier for developers to implement them.
Community and Ecosystem: Being part of the Azure ecosystem, these modules often benefit from community contributions, feedback, and best practices, enhancing their overall utility.
Examples: Common examples include modules for device management, data processing, and connectivity that can be used in IoT solutions.
What’s Improved in HugoSchedule 2.0?
Many things reader! Many things, For one - I’ve moved the deployment to only use AVM Modules, this mean you only require two files
- deployHugoScheduler.ps1
- hugoScheduler.bicep Soo less files to download, your disk space saved! 🥳
Next, Being a fan on the Penguin 🐧 - I’ve moved the App Service Plan to Linux, Because as we know Tux Rocks! But again the delay for posting was that PowerShell 7.4 was not supported under Linux App Series plans!! Major Sad times, But again as its now September, As of 12th September powershell 7.4 Support GA its now officially supported. 🙌.
So, I’ve taken some time to refactor the App Service Plan and Function App to get the Penguin really for deployment. Which. It. Now. Is.
Key Vault! Everyone knows that sorting secrets within a Function app, is bad! not recommended and will upset the Penguin! So again while moving values around in the bicep file, I’ve moved all secrets now to the Key Vault and added some neat functionally so that which ever account is used during the Bicep deployment will automatically get access to the Key Vault with:
Key Vault AdministratorKey Vault Secrets Officer
So, with that summary completed lets look at deploying HugoScheduler 2.0
Function App Deployment Time!
First thing you will want to is head to the BWC HugoScheduler Repo
Once you’re there you want to clone the repo to your local machine, You can cheat and use the below code
| |
Once cloned, Open in your favorite IDE (Obviously VSCode )
| |
From Visual Studio Code, If you want to check out the bicep file, that lives under the Bicep Folder.
If you’re wanting to start the deployment, From the Terminal Window move to the bicep folder
| |
Before you can execute, Please check you have Microsoft.AzureCLI’ and ‘Microsoft.Bicep’ Installed
$requiredApps = @('Microsoft.AzureCLI','Microsoft.Bicep')
forEach ($app in $requiredApps) {
Write-Output `r "Installing: $app"
winget install --exact --silent --scope Machine --id $app
}
Once installed, Authenticate to Azure
| |
If you want to disable ‘Web Account Manager’ Check this article Link Here
Now that the authentication step is competed, We can execute the bicep deployment.
The projectName has a limit of 5 characters!
| |
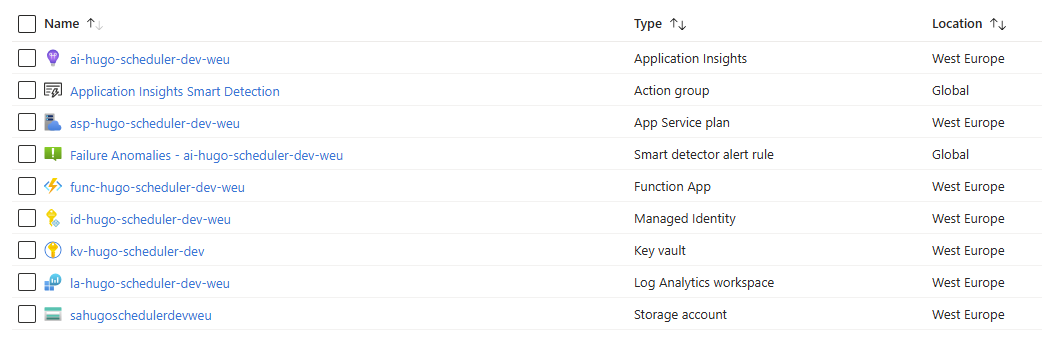
The bicep deployment takes around 4 minutes to do its thing, while deploying it creates the following resources:
- Resource Group
- Managed Identity
- Key Vault
- Storage Account
- Log Analytics
- Application Insights
- App Service Plan
- Azure Function App
IaC Completed, lets move to the Azure portal and start configuring the Function App.
From the Function App, head to the Deployment Center, I’ve created a public repository for the Function App you can just fork and point the function app to speed up the process. BWC Function App
For the Authentication Type: Basic Authentication
Next we need to head to the Key Vault and configure the 3 values
- GITHUB_USER_TOKEN
- GITHUB_REPO_OWNER
- GITHUB_REPO_NAME
GITHUB_REPO_OWNER
Your Personal or Organisation Name Example: builtwithcaffeine
GITHUB_REPO_NAME
Your Static Web App Repository within GitHub. Example: swa-builtwithcaffeine-dev
GITHUB_USER_TOKEN
A Fine-Grained access token with the following permissions.
GitHub Docs Creating fine-grained Token
    Required GitHub Fine-Grained Scope:
    - Contents [RW]
    - Pull Requests [RW]
    - Metadata [R]
Before you can use the Function App, You’ll need to update the above references in the Key Vault and then restart the Function App to pull the values down.

Post Scheduling Guide
createNewPost.ps1
The createNewPost.ps1 file, requires Git.Git and Hugo.Hugo.Extended to be installed on the local machine. The PowerShell file nicely wraps several steps into one executed line.
The file supports two parameters environmentName and newPost
- environmentName
The supported validators for this parameter aredevorprod. These values need to be updated before you can run and point to the local production and development hugo repositories. - newPost
This is used for the post name folder under/content/posts/<post-name>.
but is also used to create a git branch aspost/<post-name>
| |
Under the hood what is happening?
- create a git branch for the post: [post/«post-name»]
- creates a folder under: [./content/posts/«post-name»]
- creates an assets folder: [./content/posts/«post-name»/assets]
- creates a branch checkout ready for the single post.

publishNow.ps1
Before running the Publish file, Open the file in your favorite IDE and edit line 110 and replace with the default (Function key) for the createGitHubPR function. This allows the user to automatically create a Pull request from the branch commit and post.
| |
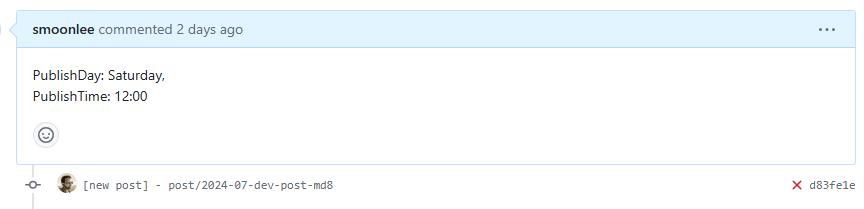
The file supports two parameters publishDay and publishTime
publishDay
The supported validator is well days of the week.publishTime
Currently this is defined on an hourly basis, you could update the variable to also include 15 minute or 30 minutes intervals. But I thought for now posting on an hourly basis would work fine. ALso remember to take this into the account for the MergeGitHubPR Function. As the timer trigger will need to be updated to reflect the additional time entries.
| |